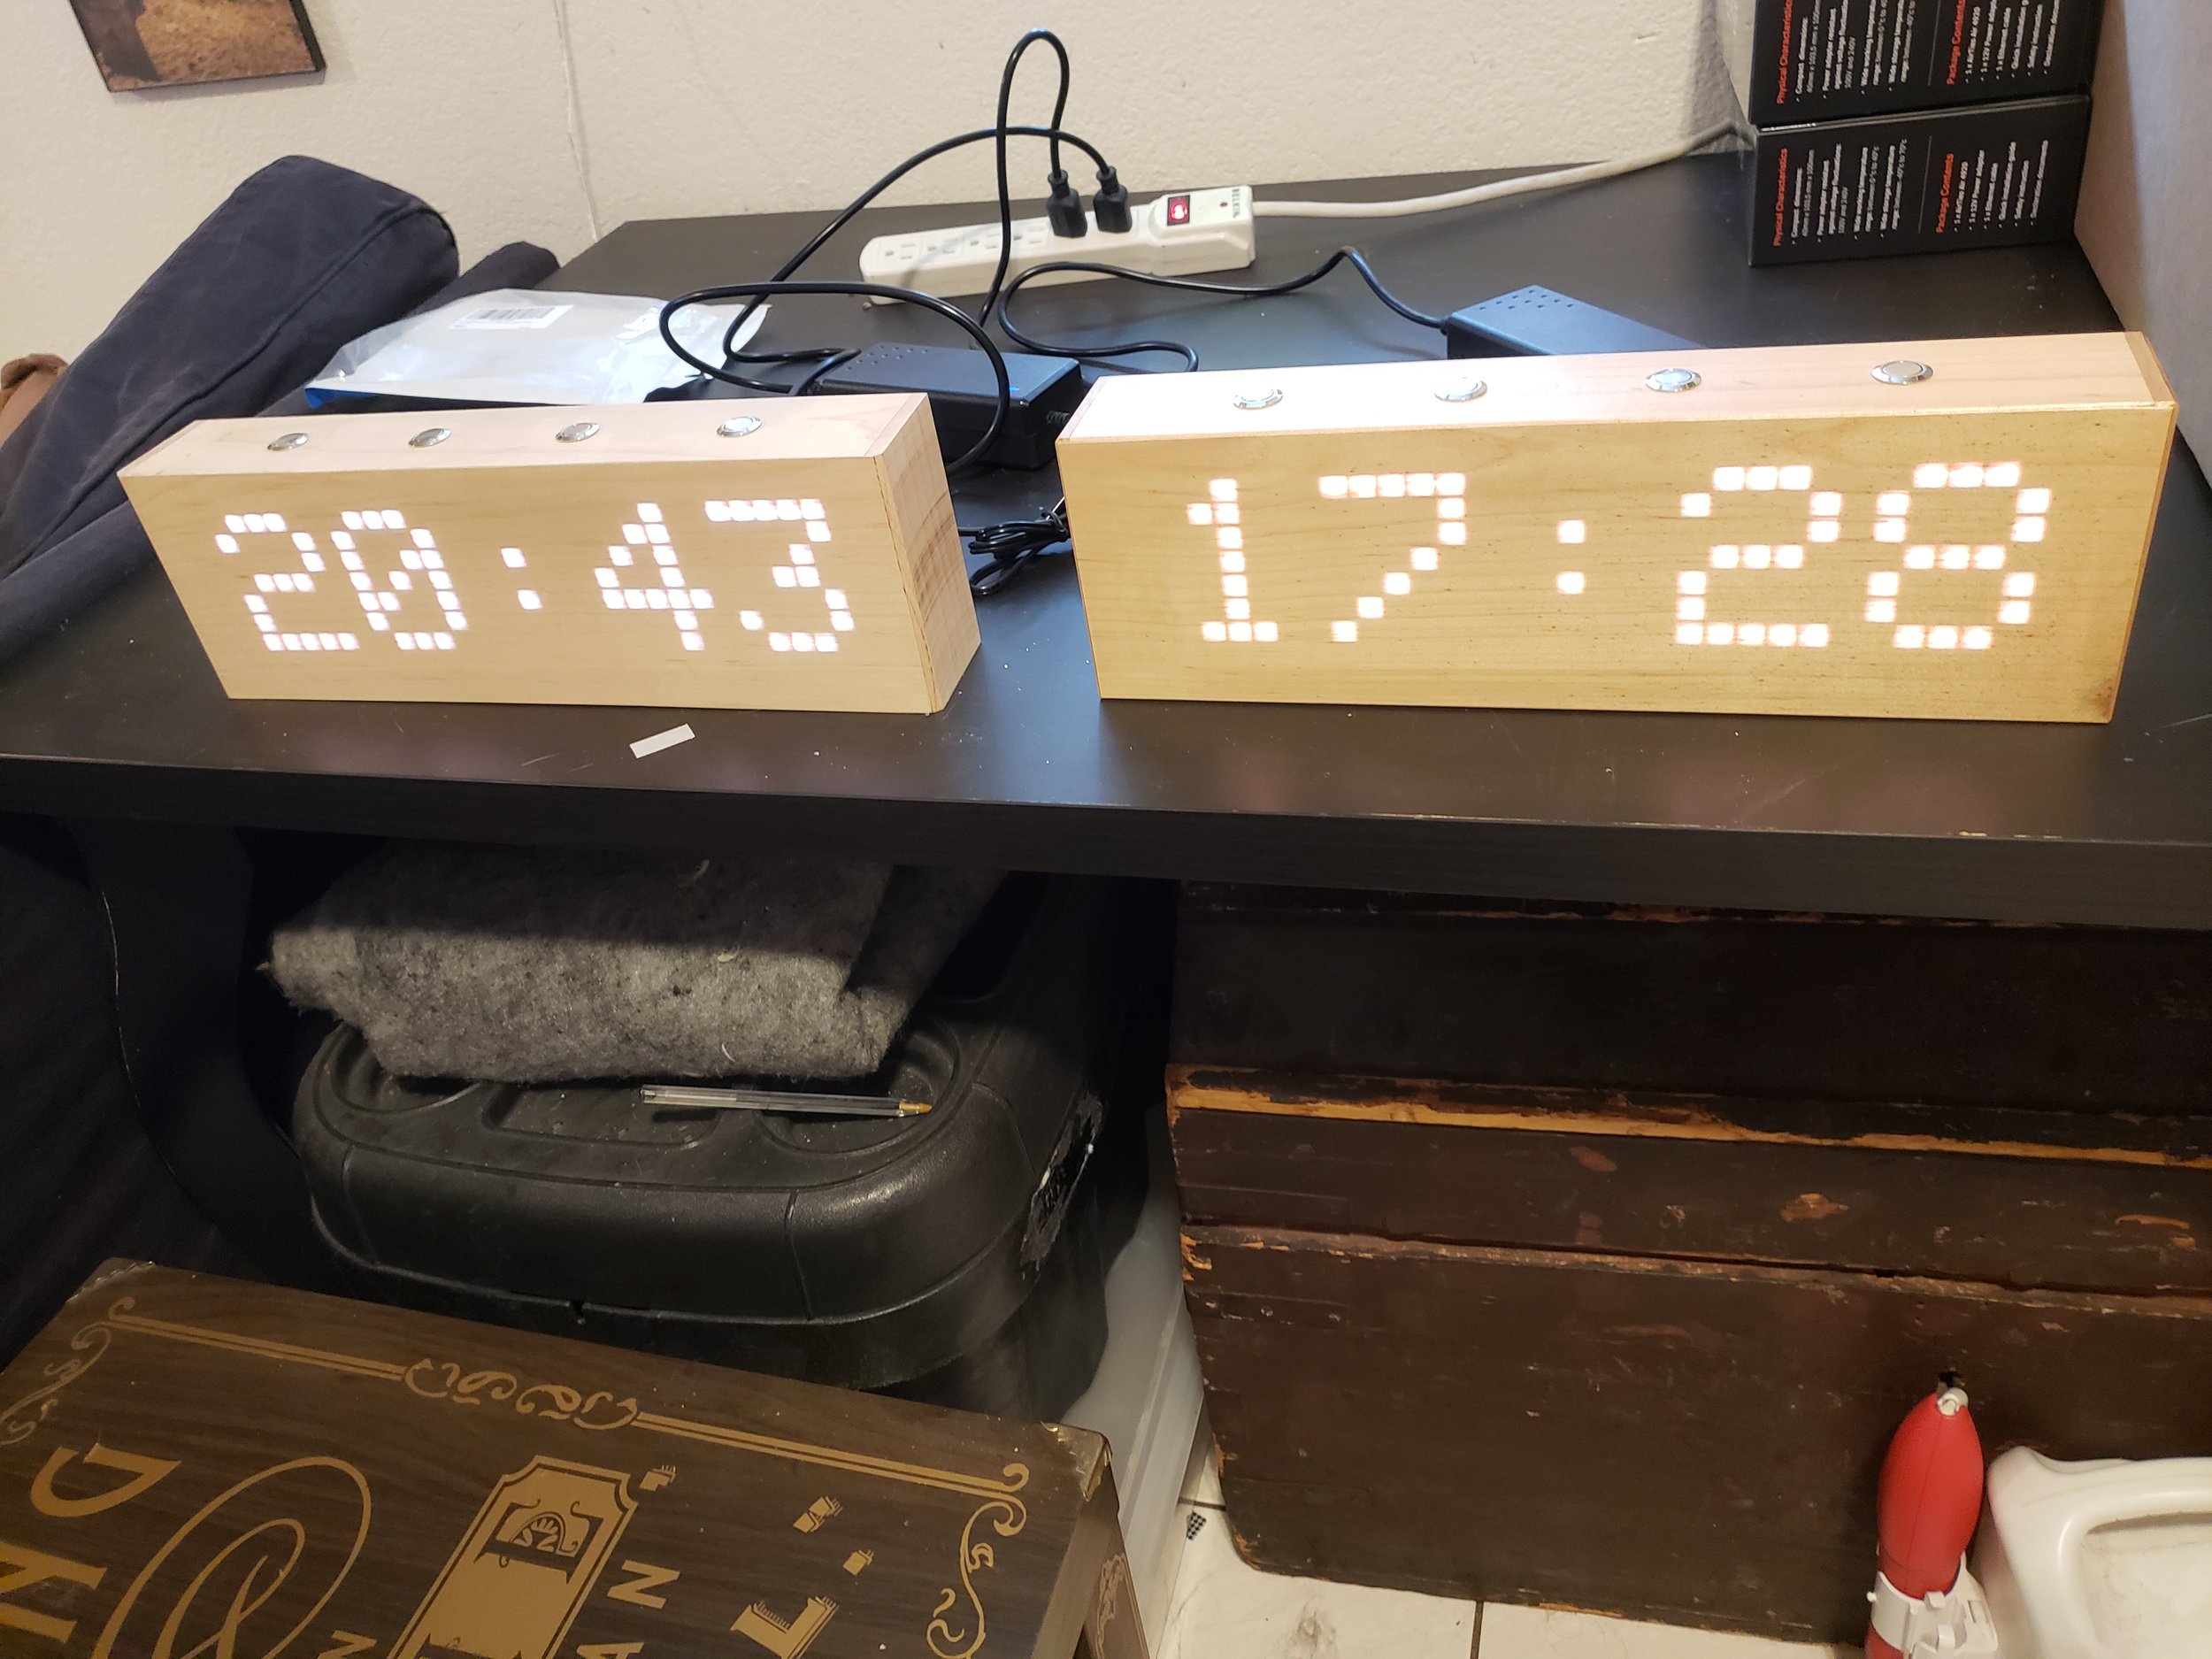
Bantam Tools’ Devin Cooper’s Wooden Digital LED Clock

Bantam Tools' own technical manager Devin Cooper recently delved into the world of woodworking by taking a class. Naturally he then merged his knowledge of PCB creation with his newly honed woodworking skills to make this neat digital LED clock. He designed a custom Arduino shield and milled it on the precise and always reliable Bantam Tools Desktop PCB Milling Machine. Devin also shared his EAGLE design file. We chatted with him to learn more.
1. What gave you the idea to make an LED clock?
I had seen various LED matrix displays and also a few examples of commercial clocks that used the thin veneer of wood to mask a digital display.
2. What was your basic R+D process?
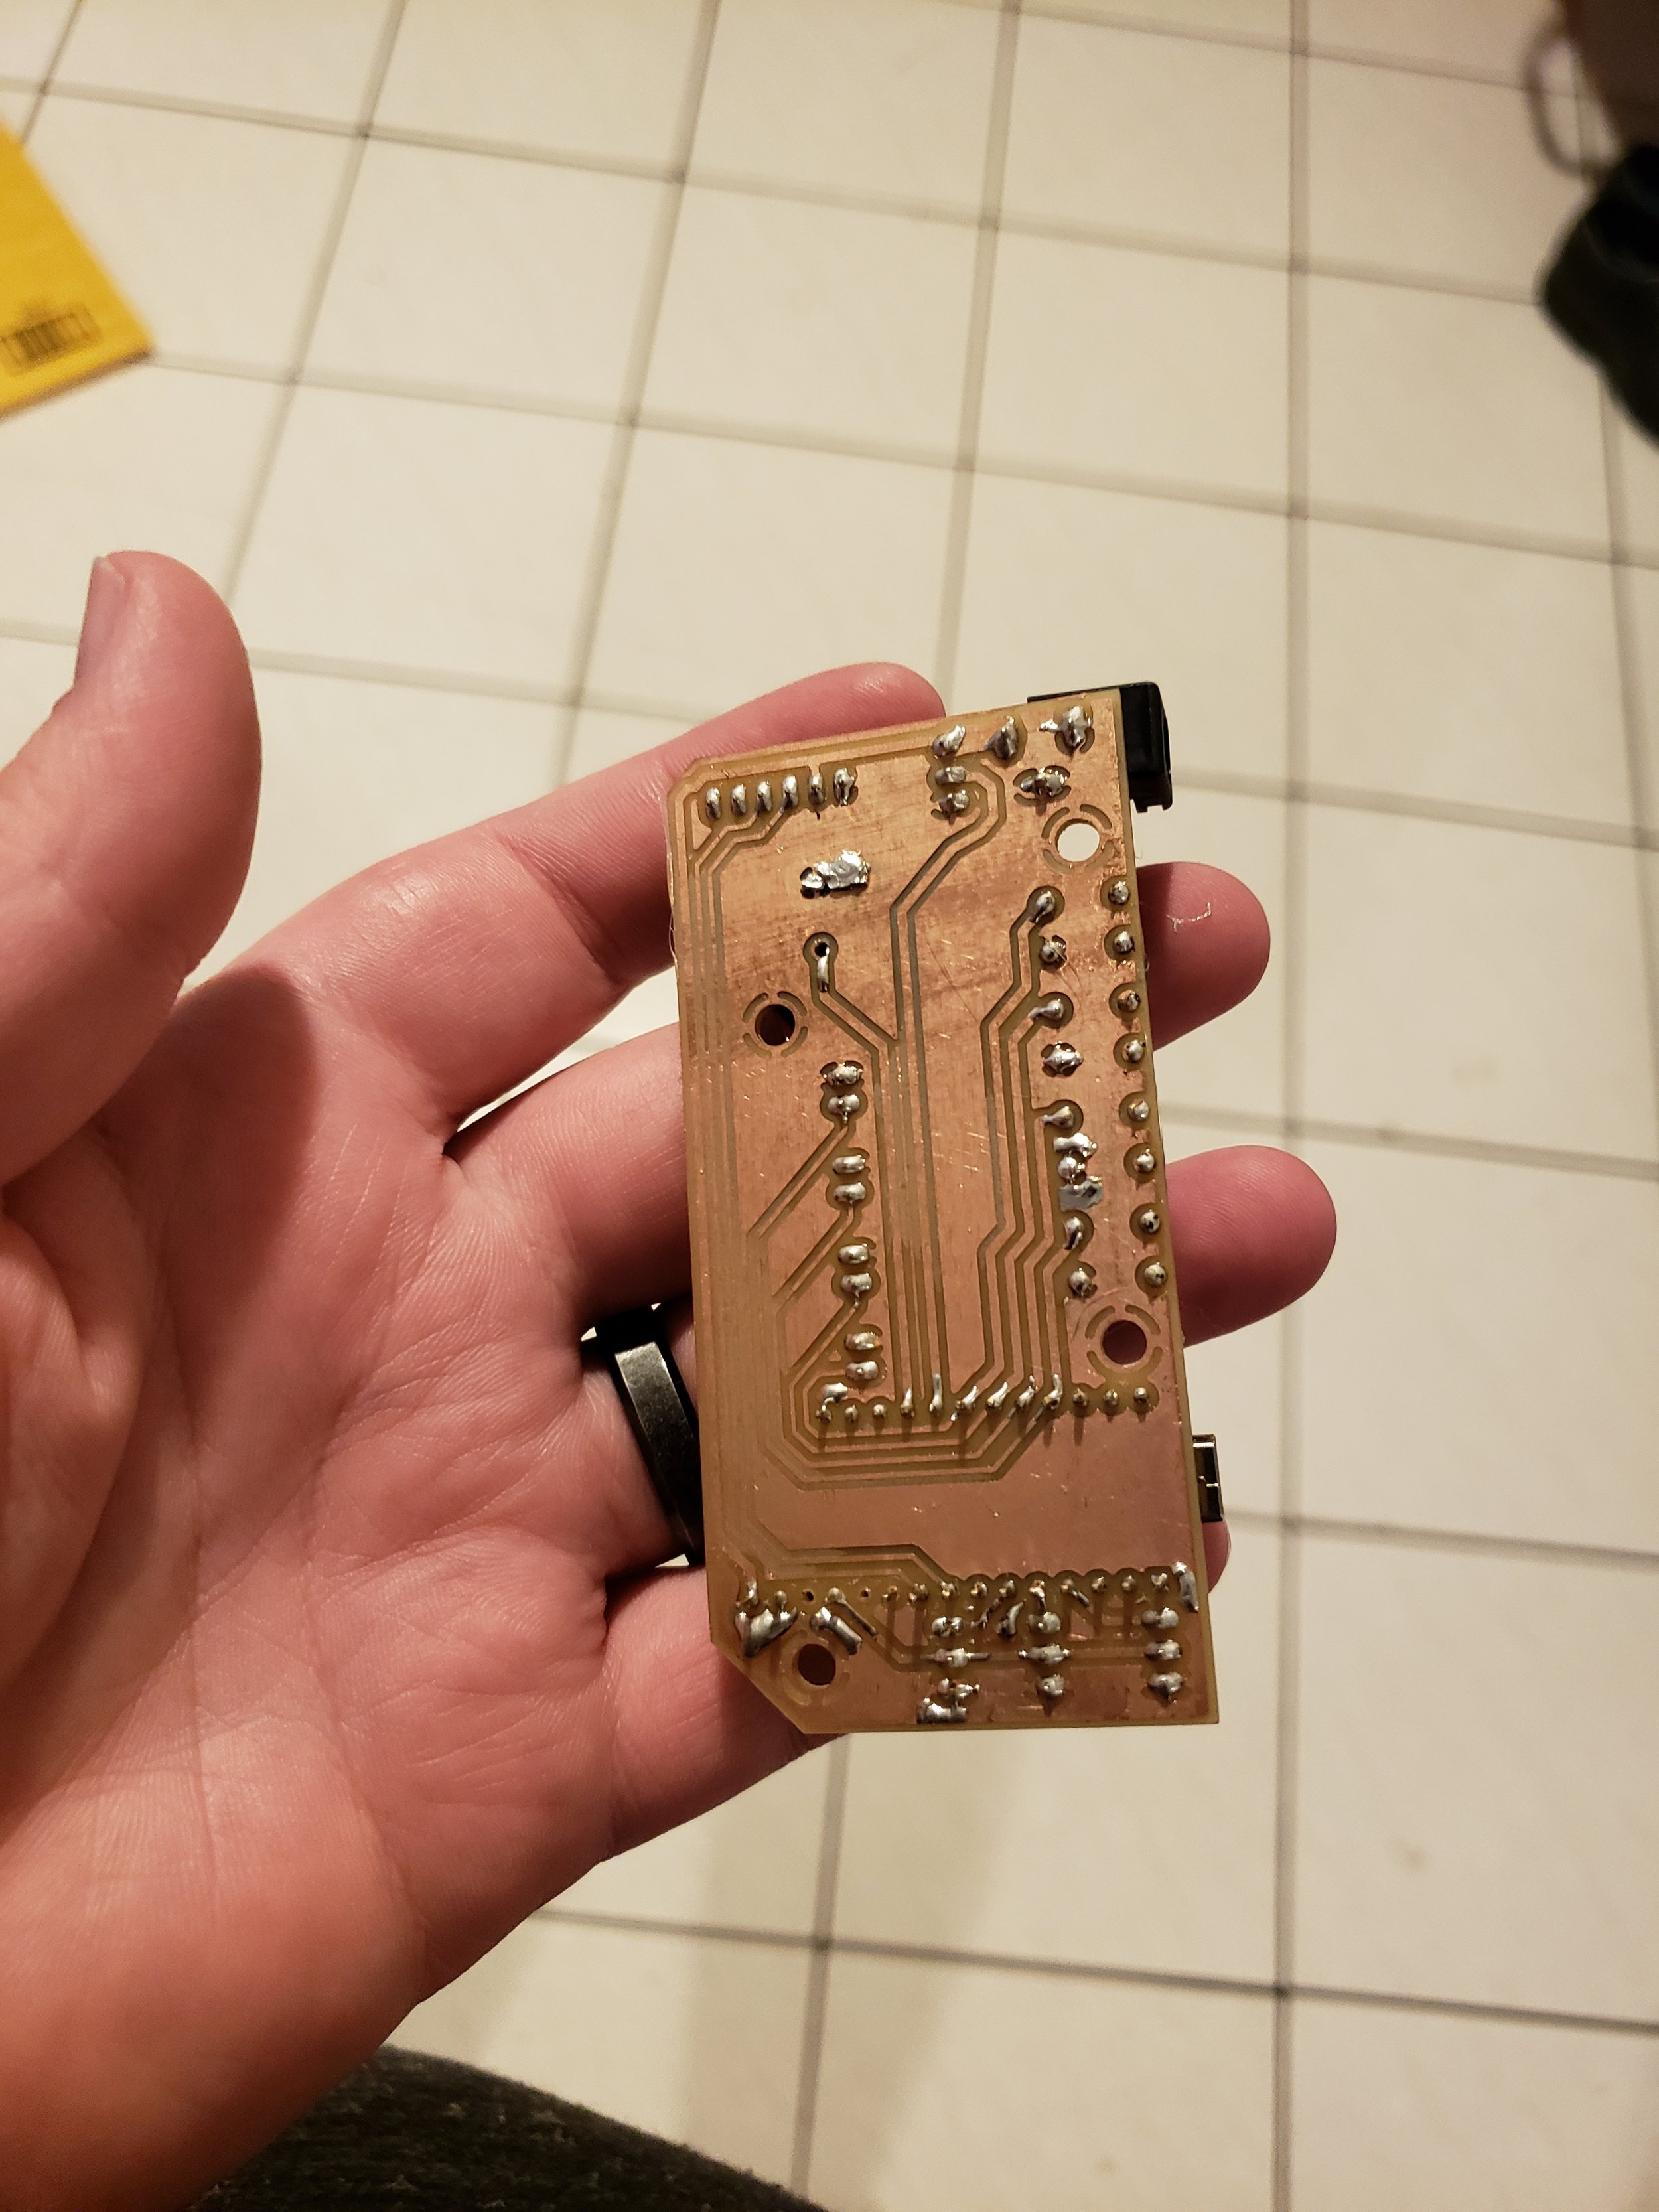
I started by modeling the concept in Fusion 360 to get the general dimensions. Then I figured out the requirements for the functionality I was looking for, created the schematic in EAGLE and cut a test board on the Bantam Tools Desktop PCB Milling Machine. Finally, I tested all the components before refining the schematic and board to include buttons, extra headers and power connectors.
3. What did you learn while you were making it?
The LED matrix can, in theory, pull a lot of power and it's important to make sure the traces are wide enough to support the current required.
4. What were the main materials and tools that you used?
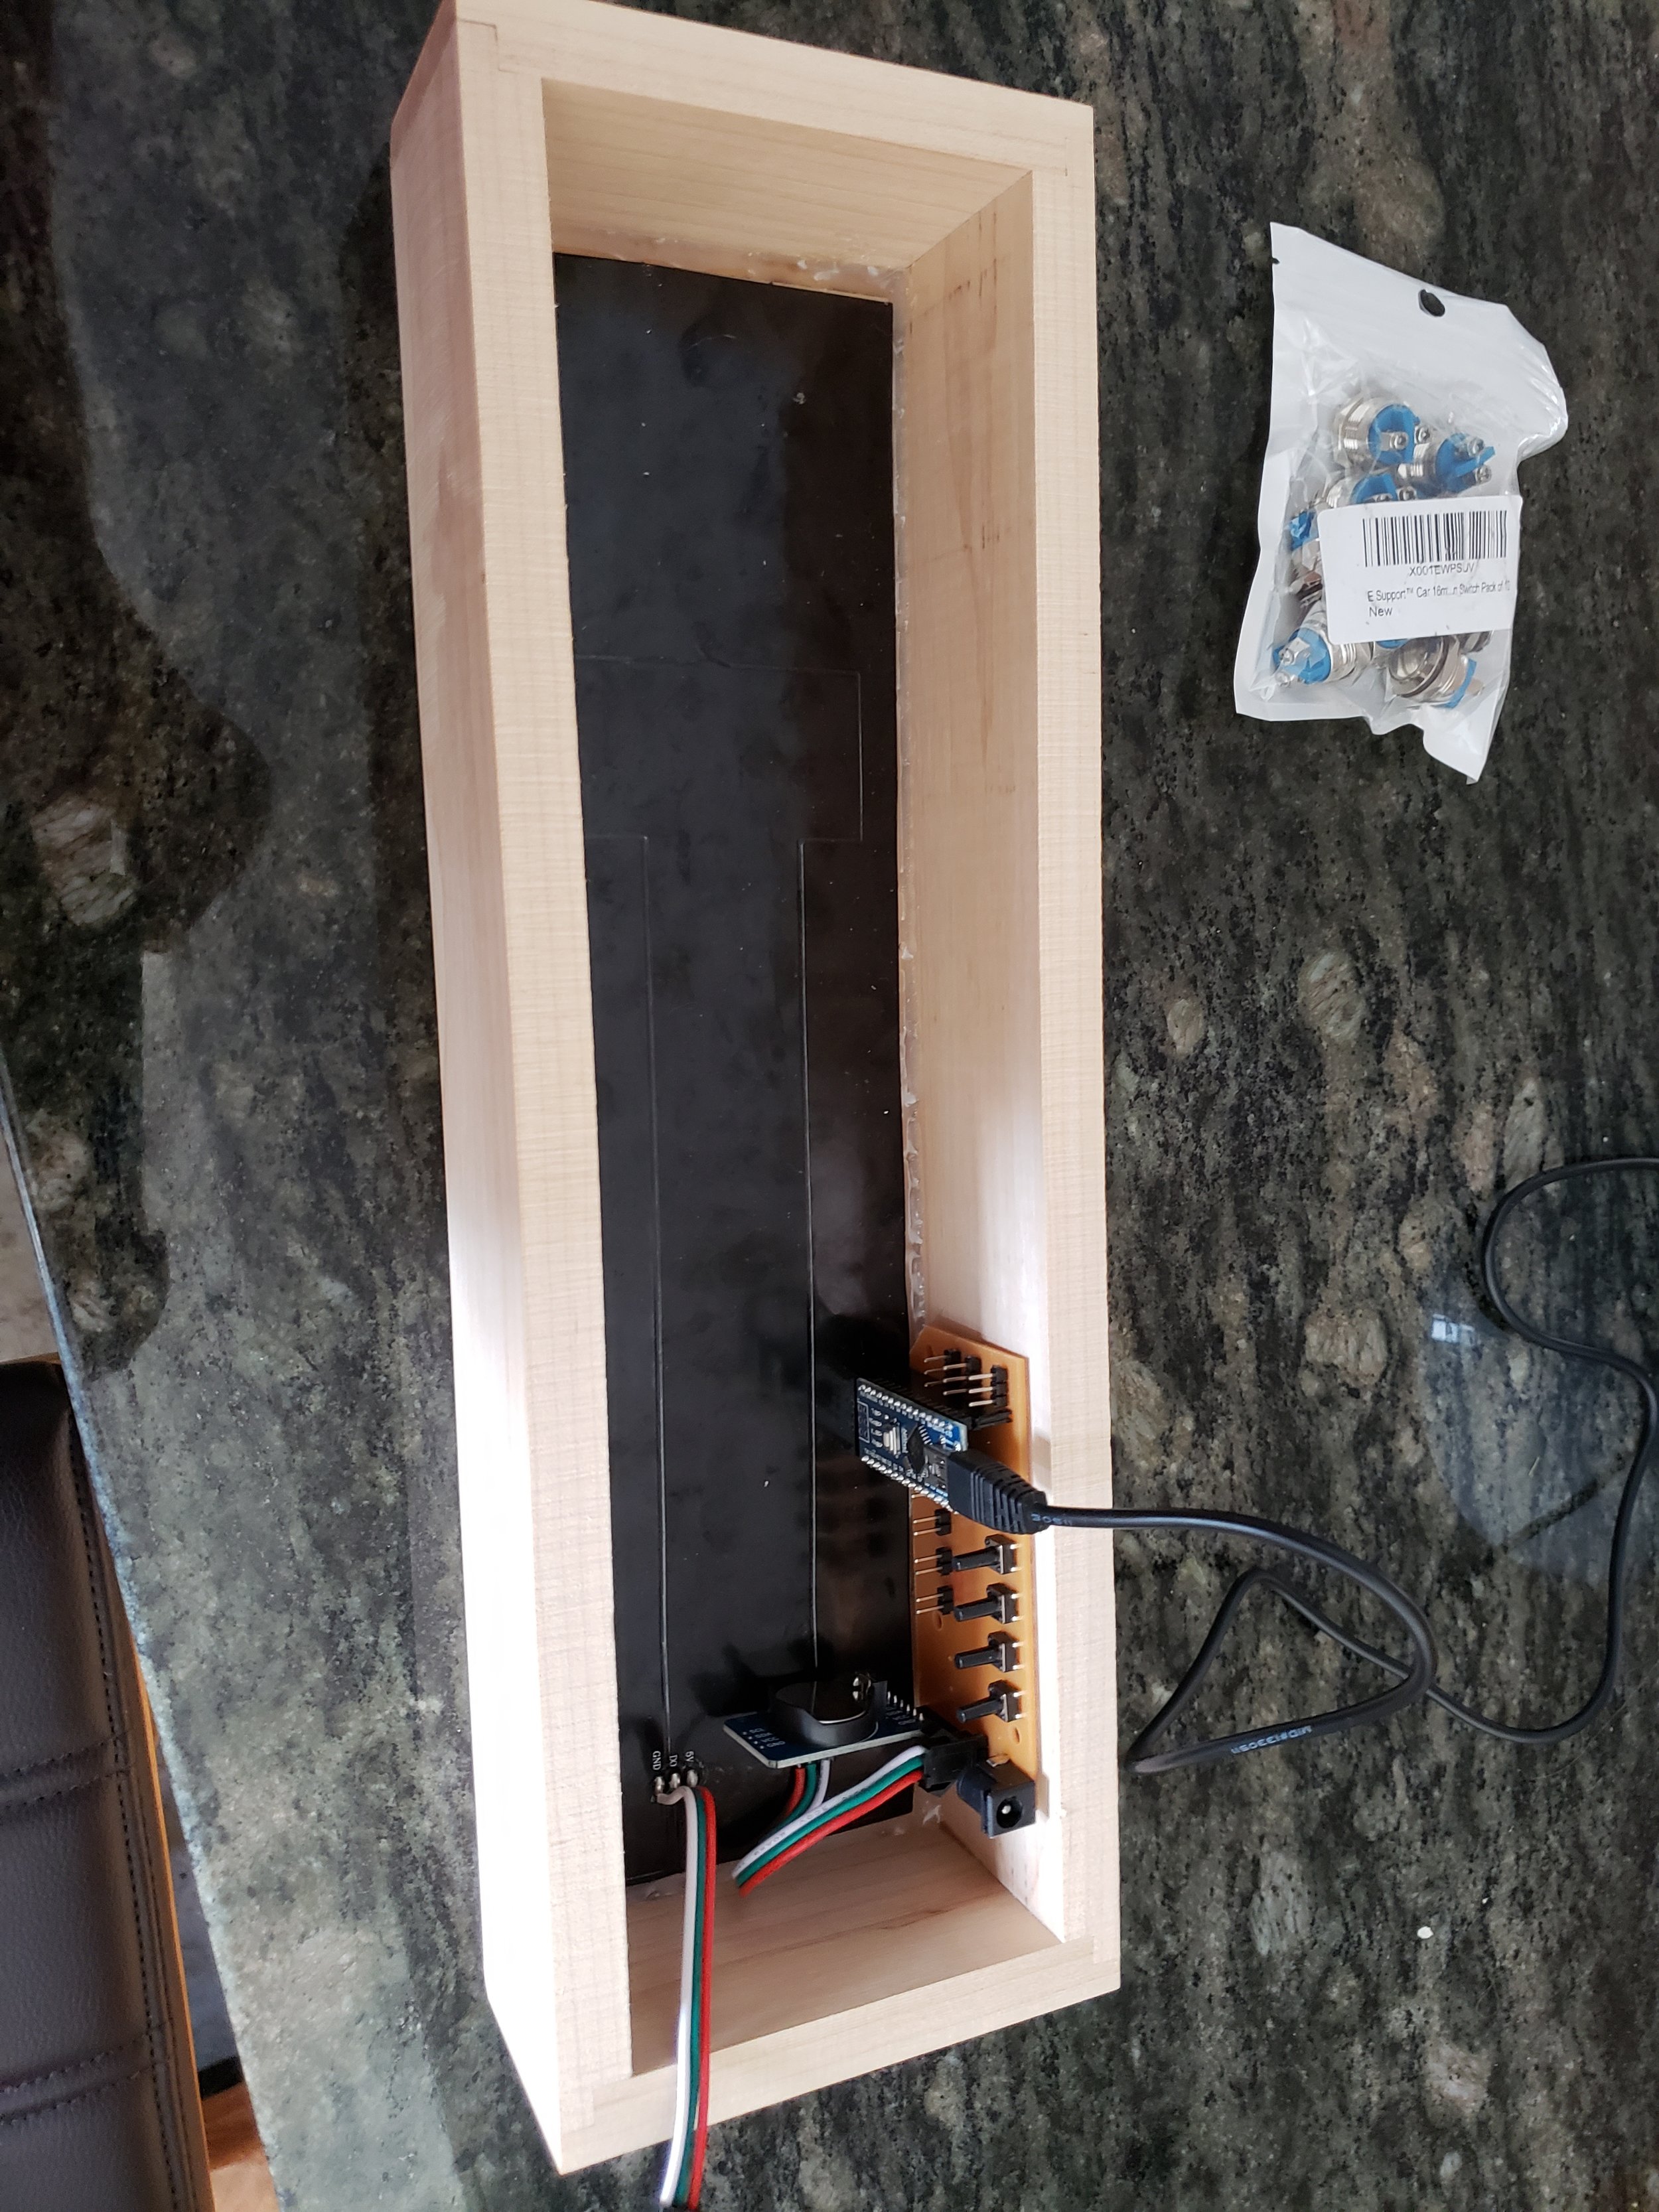
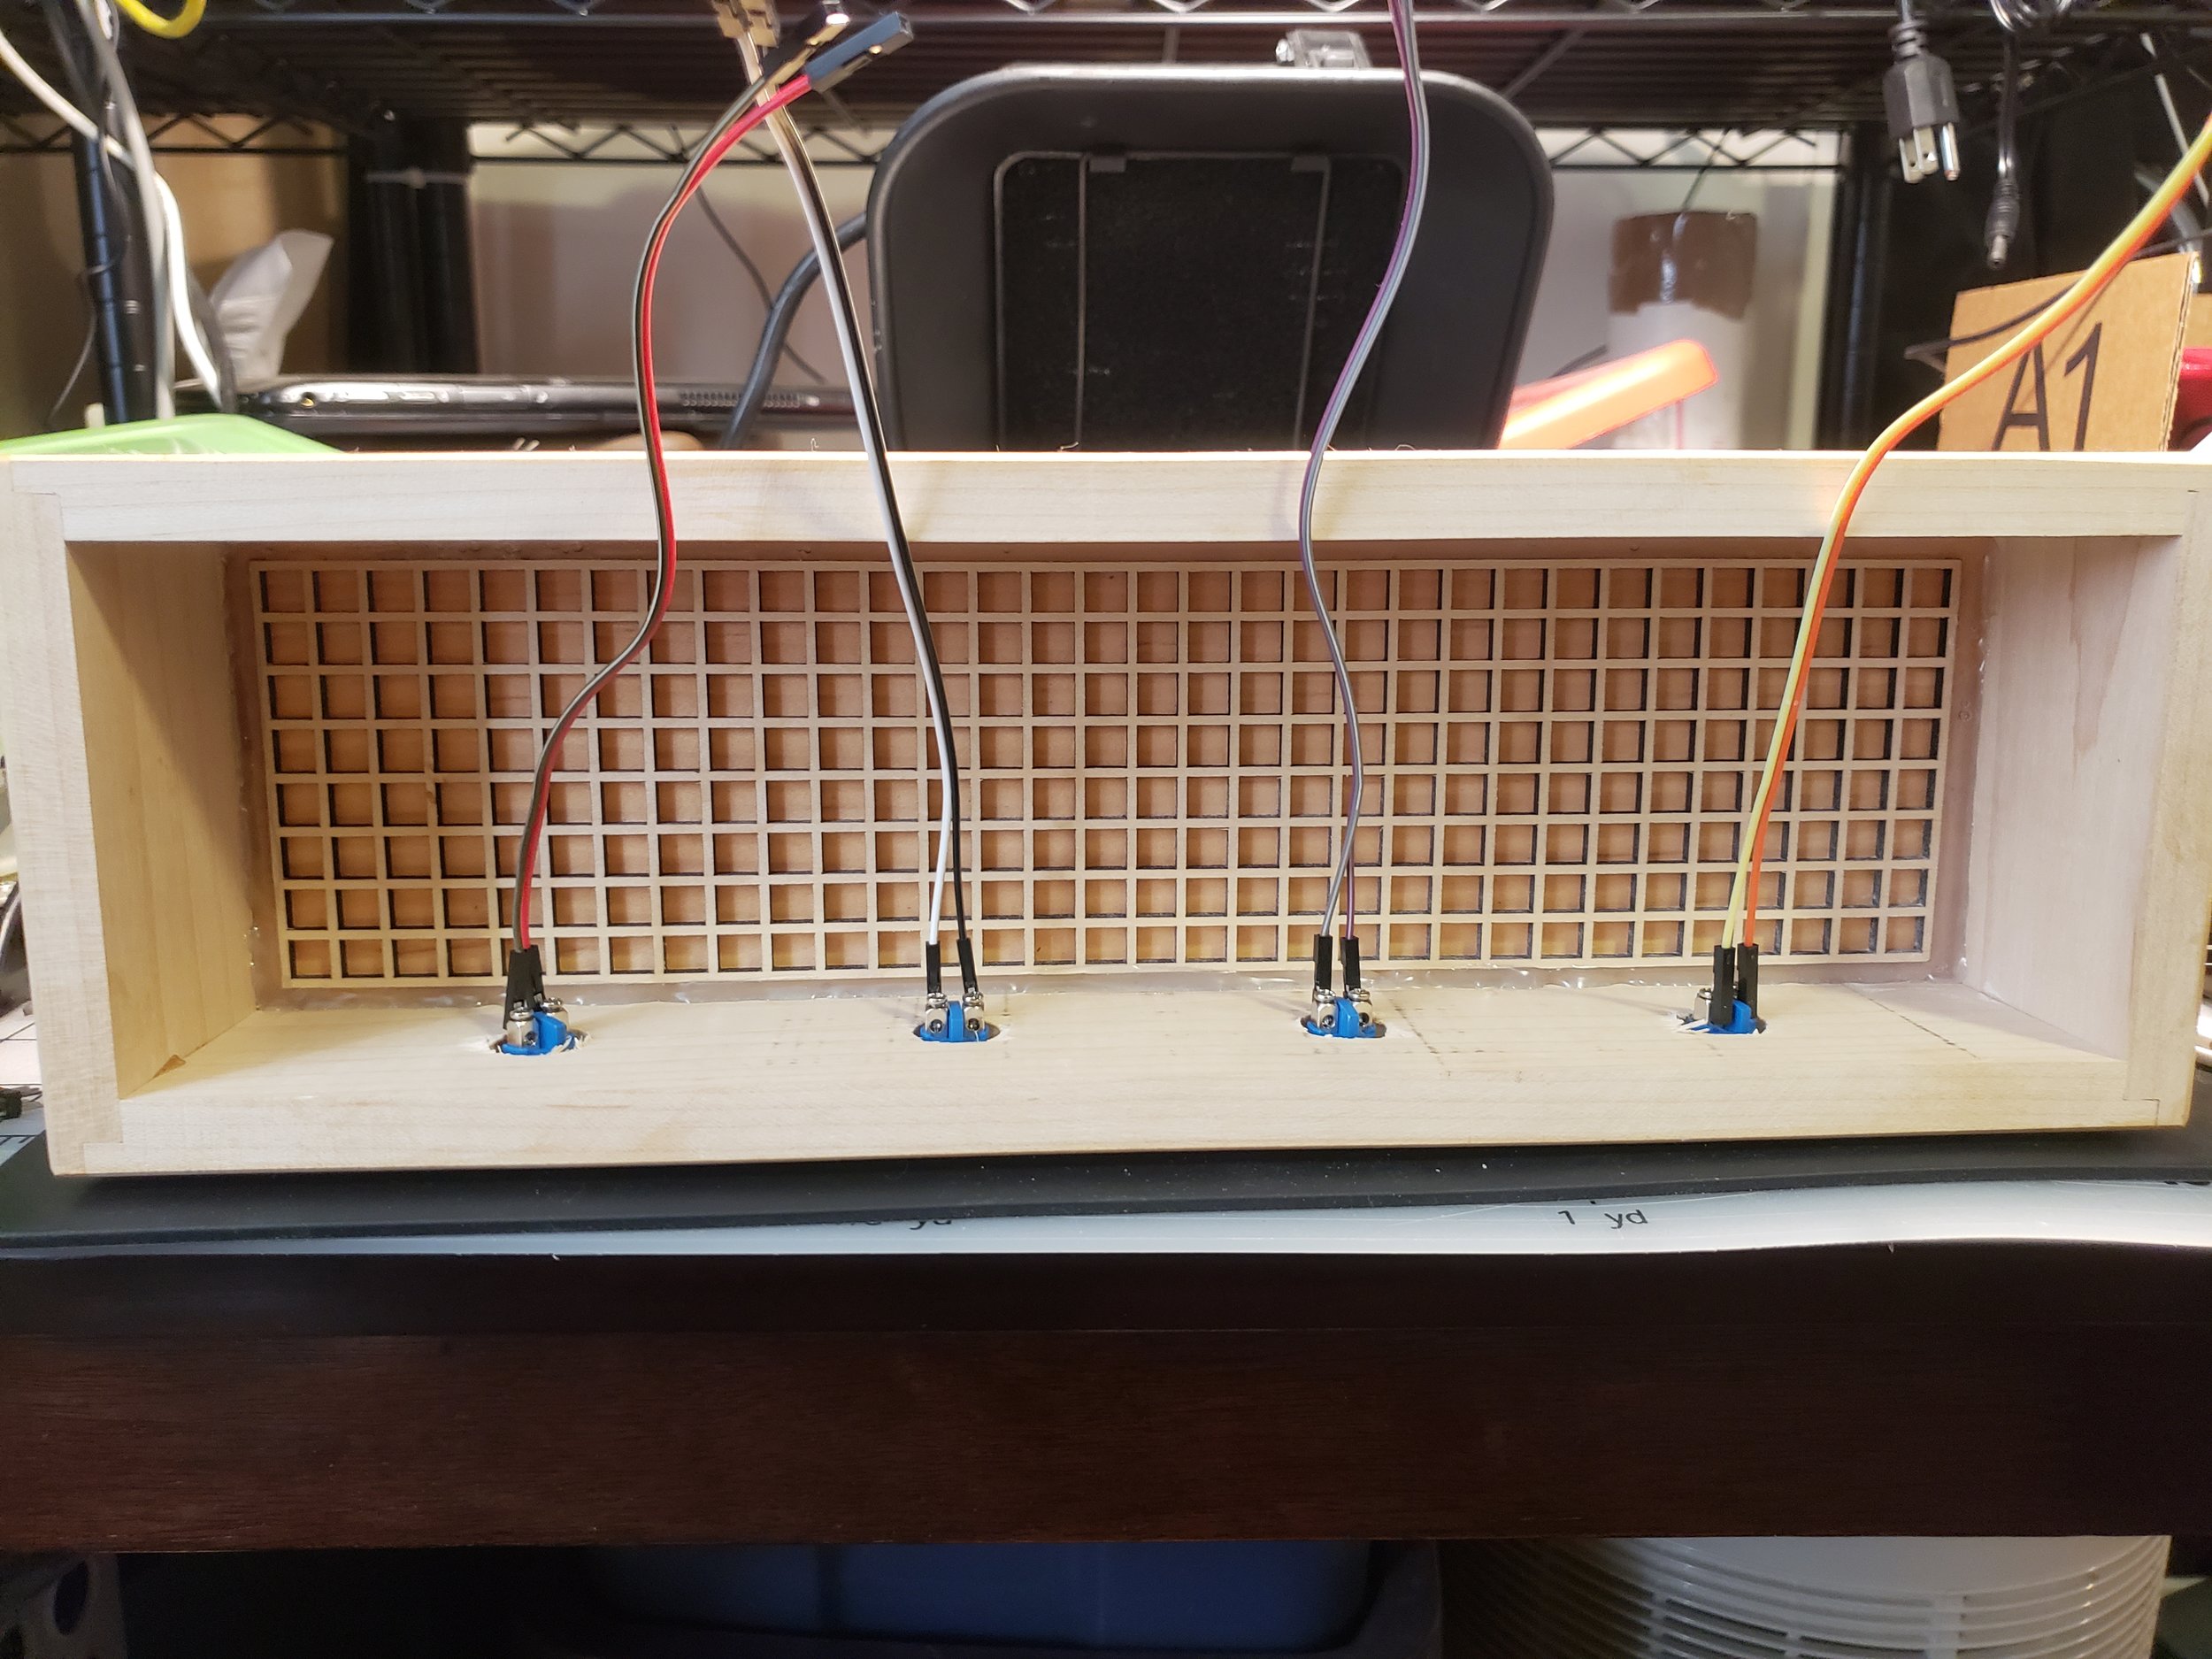
Maple hardwood and veneer, wood glue, a sander, a band saw, a Glowforge (to cut the square grid that makes the pixels appear as squares instead of circles, pictured below), the Bantam Tools Desktop PCB Milling Machine, an Arduino nano, a DS3231 RTC module and Arduino IDE for programming. I also used Adafruit’s Matrix Library to drive the LEDs.
5. Any tips and tricks you can offer to someone who wants to make one?
When gluing the veneer, it's important to have it clamped between flat rigid surfaces to prevent warping.
6. Any tips about the milling the board?
I started out with the intention to make a single-sided board and did my layout accordingly. I also designed all the clearances so the board could be cut with a single 1/32" tool on our machine.