Three Key Steps for Working with the Desktop PCB Milling Machine Fusion 360 Templates
With so many different boxes to check and tools to choose from, programming CAM can be daunting and time-consuming. But what if it didn’t have to be? Introducing Fusion 360 toolpath templates! With these templates for machining wax and HDPE, you can begin generating toolpaths for the Bantam Tools PCB Milling Machine within minutes. Just drag and drop your design model into a Fusion 360 template with preconfigured speeds and feeds, hit generate, and you’ll have a collection of toolpaths to choose from in seconds. Follow the steps outlined here to get started!

STEP 1: DOWNLOAD THE TEMPLATE
Download one of the following Fusion 360 templates for the Bantam Tools Desktop PCB Milling Machine.
STEP 2: LOAD YOUR MODEL
Open the link to the template you wish to use (we’re using the machining wax template for this blog post), click “Open in Fusion 360” in the top right corner, and follow the prompts. Once the templates have downloaded, navigate to the design workspace in Fusion 360 and click the dropdown on the main model folder. You’ll see the example model labeled “Your Model Goes Here”. Delete this model. Your screen should look similar to the picture below.

Save the template as your own.
While in the Design tab, navigate to the model you wish to import. You can either drag and drop it into the Main Model folder, or right-click on the model, click Insert Into Current Design and then make sure to move the file into the Main Model folder. As long as your model is aligned to the origin point and within the bounds of the stock, you can proceed to the next step. Otherwise, use the Align and Move commands to position your model on the machining bed.
STEP 3: CHECK YOUR STOCK
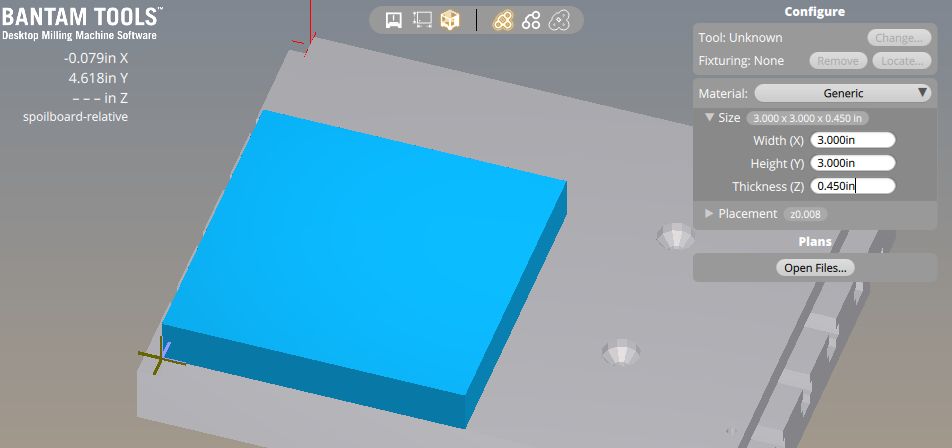
Click over to the Manufacturing tab. The stock size we’re using for these templates is the default size for materials we have in our store. To ensure precision, measure the size of the stock you’re working with and adjust the dimensions in Fusion 360 accordingly. To do this, right-click on the Bantam Tools Machining Wax Folder, click edit, and then in the pop-up window, go to the Stock tab and select “Fixed size box”.

The stock size thickness you enter into Fusion 360 will also need to be input into the Bantam Tools Desktop Milling Machine Software before you begin milling
STEP 4: GENERATE CAM TOOLPATHS
Alright, this is where the magic happens. Click over to the Manufacturing tab and scroll down to Setups. Right-click on the folder named Bantam Tools Machining Wax Template (or whichever template you’re working with) and select Generate. That’s it!

Within seconds, you’ll have a number of toolpaths to choose from with pre-programmed feeds and speeds! Some models may require minor adjustments depending on the specific geometry, but these toolpaths should give you a general starting place to work from—and most of them work completely unmodified. To get a better understanding of how your part will look once finished, use the Simulate feature in Fusion 360.
STEP 5: CHOOSE YOUR TOOLPATHS
Now all you have to do is choose which toolpaths you want to run. This is where the beauty of these templates really begins to show. By clicking on each toolpath, you’ll see what each one will look like. After you select your toolpaths, go to Actions, click Post Process, and generate your G-code.

Note: For a more detailed look at CAM toolpaths in Fusion 360, check out our how-to.
Is there a topic you’d like us to cover in our next how-to video? Email resources@bantamtools.com or reach out to us on our social channels. Be sure to follow us on Instagram, Facebook, and Twitter for the latest how-tos, CNC projects, and updates!